Shopify gives merchants wide latitude in customizing almost everything about their online store, with a wide selection of Themes that can further be edited to your specific needs. Changing the color, font size, position – all can be changed through the Shopify admin or with a bit of CSS, HTML and Liquid code knowledge.
The one area Shopify unexpectedly limits your ability to customize is with the checkout pages. These are the pages that your customers see after clicking the Checkout button in your shopping cart.
If you’re confused about how and to what extent you can customize the checkout pages, you’re not alone, as there is quite a bit of conflicting and unclear information. We’ve put together the most straightforward and clear explanation of what you can and cannot customize during checkout.
What’s so special about Checkout Pages?
Checkout pages are tricky, because they are extremely crucial for converting sales and minimizing friction, yet from a software perspective, they are also the most difficult to maintain and ensure security as you are now starting to collect personal information and financial details from your customers.
When a customer starts a checkout, the following will happen:
- The customer will be taken to a new URL subdirectory outside of the main store pages (youshopname.com/XXXXXX/checkouts/… where XXXXX is your Shopify merchant ID)
- A new checkout ID is created on the backend, and if the customer fills out all the fields on the first screen (email, name and shipping address), you will see the checkout show in your list of abandoned checkouts
- Only the shopping cart information will be transmitted to the checkout page. No theme file modifications or third-party theme information is transferred to the checkout pages.
Your Shopify theme’s code does not directly carry over to the checkout pages, and this is by design for security reasons. For example, if the checkout pages were to be integrated with the store’s main theme files, a malicious third-party Shopify Theme publisher could theoretically inject some hidden code that transmits customer data to their own database for further abuse and fraud.
As a result, Shopify’s engineers have no choice but to isolate the checkout pages from the rest of your store’s theme files and other customizations, and maintain a separate mechanism for customizing these pages.
Shopify vs Shopify Plus
The first thing to note is that Shopify has an exclusive tier for high-volume sellers called Shopify Plus. A subscription to Shopify Plus costs $2000 per month or higher, so this is going to be an immediate dealbreaker for most merchants who are just starting out.
If you see references about editing the checkout.liquid file, unfortunately this is only accessible to Shopify Plus merchants and you will not be able to make any edits to the checkout process.
We want to point this out at the beginning so that you are not misled into thinking that you may somehow have access to checkout.liquid, only to be told later that you’ll need to pay thousands a month just in subscription costs.
With that being said, below is a list comparing what can and cannot be modified for the checkout pages for each of the Shopify tiers.
| Basic Shopify, Shopify & Shopify Advanced | Shopify Plus | |
| Cost | $29~$299 per month | $2000+ per month |
| Change header / background image | Yes | Yes |
| Change fonts and colors | Yes | Yes |
| Change text / wording | Yes | Yes |
| Access to checkout.liquid file | No | Yes |
| Add separate HTML and text elements | No | Yes |
| Custom CSS and JavaScript | No | Yes |
| Modify checkout fields | No | Yes |
| Modify checkout URL | No | No |
Assuming you don’t have the budget for Shopify Plus, let’s take a look at the three aspects (the three Yes marks above) that you are able to customize with the standard Shopify offering.
Modifying the Checkout Page Header and Background Image
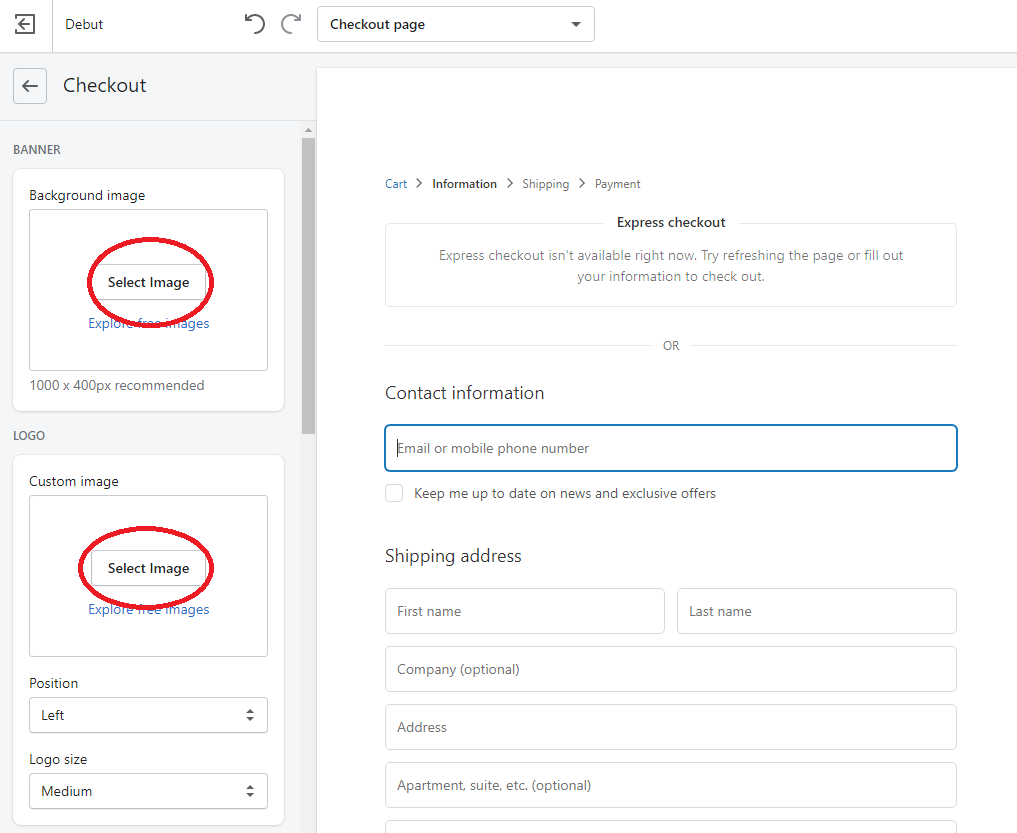
The most obvious area where you can improve the visual appeal of your checkout pages is by adding a custom page header and/or background image.
A header image will live at the top of the checkout page, and will appear similar to cover photos on social media profiles. Not all merchants will use a header image, as they can be somewhat distracting.
A logo might be a good minimal but essential brand element for the checkout pages, and we most commonly see merchants go this route.
See below for step-by-step instructions on how to customize checkout page images.
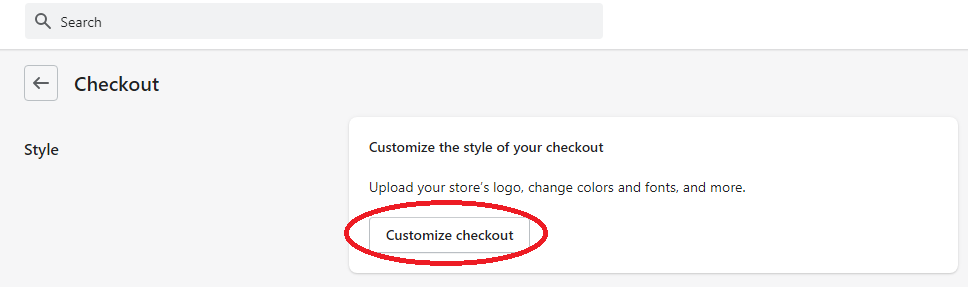
Step 1: In your Shopify admin, click on Settings (bottom left corner) and then Checkout.

Step 2: Click on Customize checkout under the Style section (at the very top)
Step 3: Click on Theme settings (bottom left)
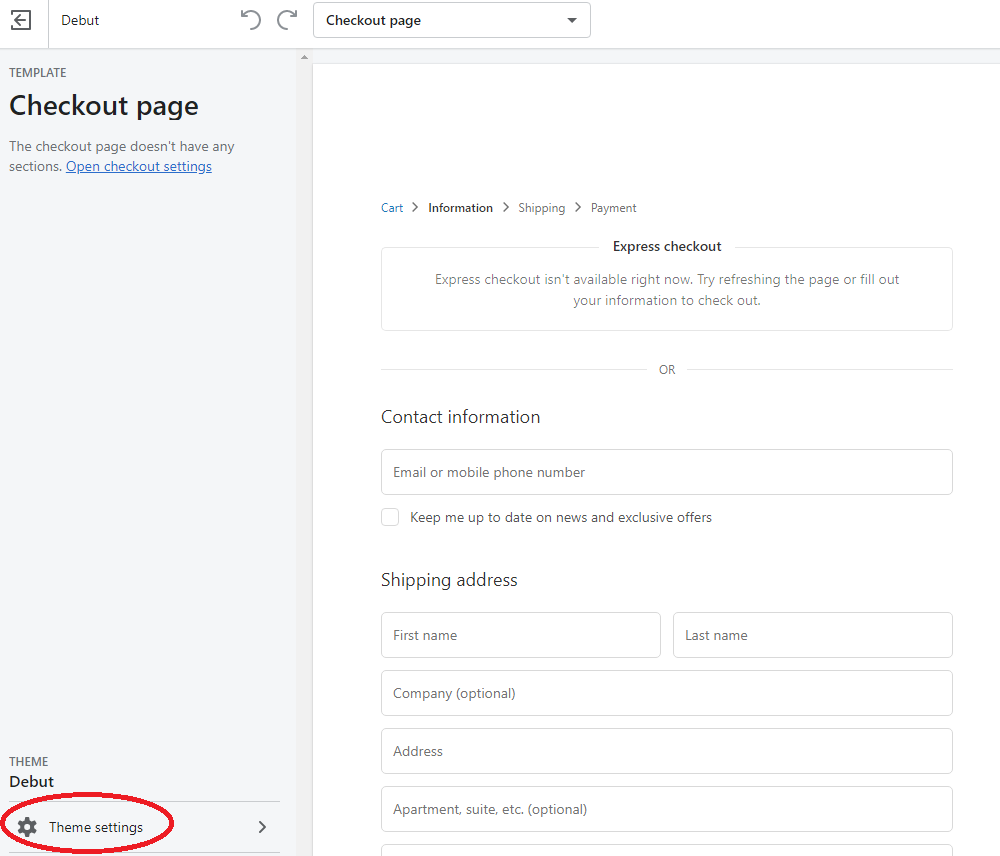
Step 4: Click on Checkout
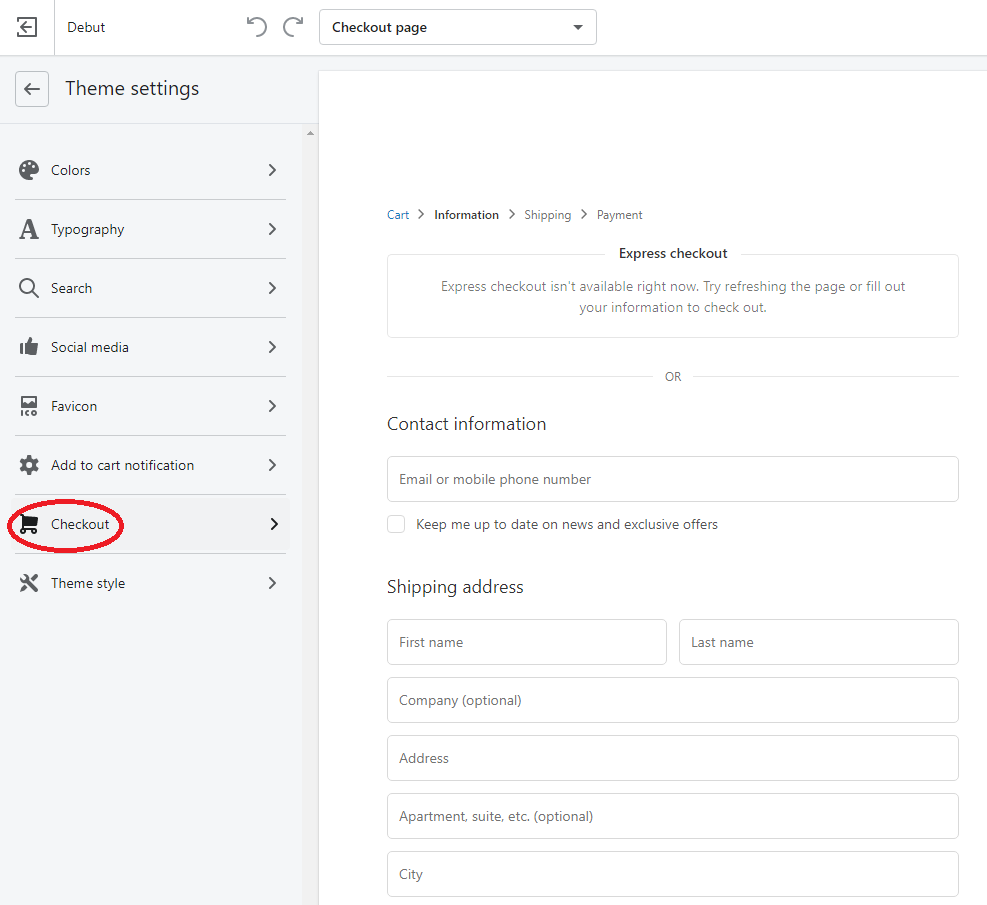
Step 5: Upload a banner image, logo image and/or background image as you see fit, and click Save when done.
Modifying the Checkout Page Fonts and Colors
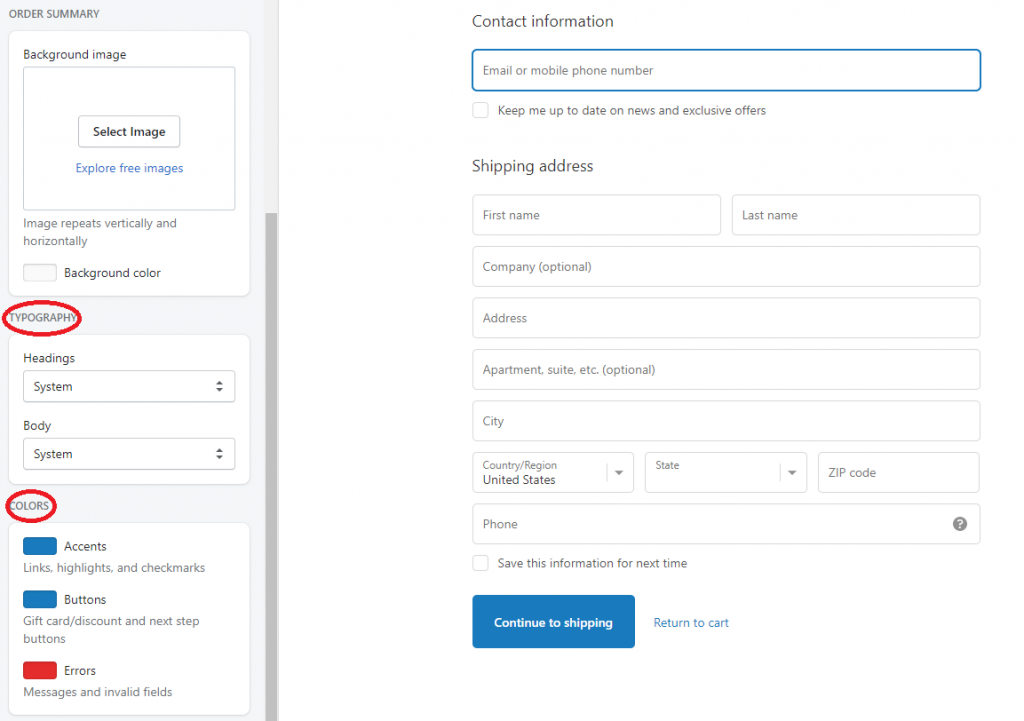
Shopify allows merchants to control certain text and button element styling features on the checkout pages. For example, font types, colors and button colors can all be modified here. Unfortunately, custom CSS and JavaScript to enact more extensive modifications are not permitted, but these small amounts of flexibility can be helpful in ensuring a consistent brand experience for customers transitioning from your highly customized Shopify store through the checkout process.
Step 1: Follow steps 1-4 above to reach the theme’s Checkout customization screen
Step 2: Modify the font and color settings using the control panel on the left-hand side, under Typography and Colors. Click Save when finished.
Modifying the Checkout Text and Wording
One unexpected “hack” that Shopify provides merchants is the ability to modify the wording of various checkout phrases and language. Shopify allows merchants to “translate” various default phrases to whatever they choose. While you cannot add any custom text or any dynamic HTML or JavaScript code, this does provide you with a little bit of flexibility in how the text and wording is presented.
To modify the checkout text and wording, follow the steps below:
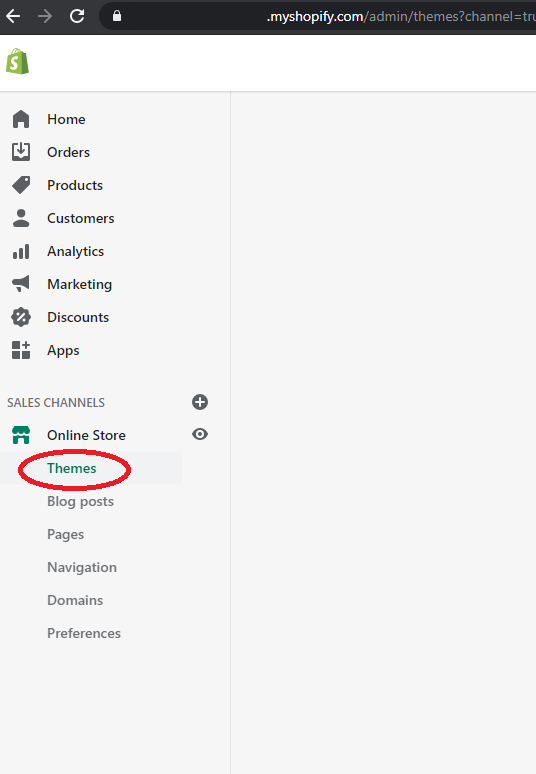
Step 1: Navigate to the Themes page by clicking on Online Store and then Themes.
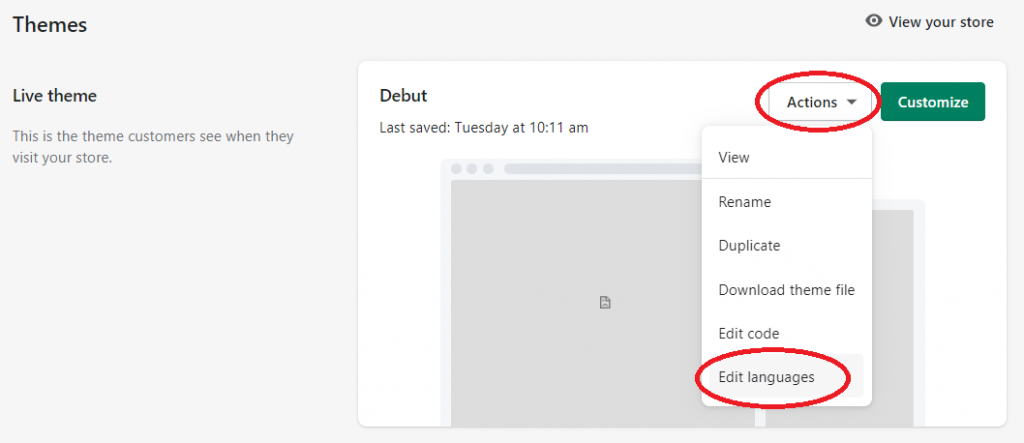
Step 2: Click on the Actions button, followed by Edit languages
Step 3: Click on Checkout & system (this setting might be hidden if your screen width resolution is limited – if so, click on three dots to show this option).
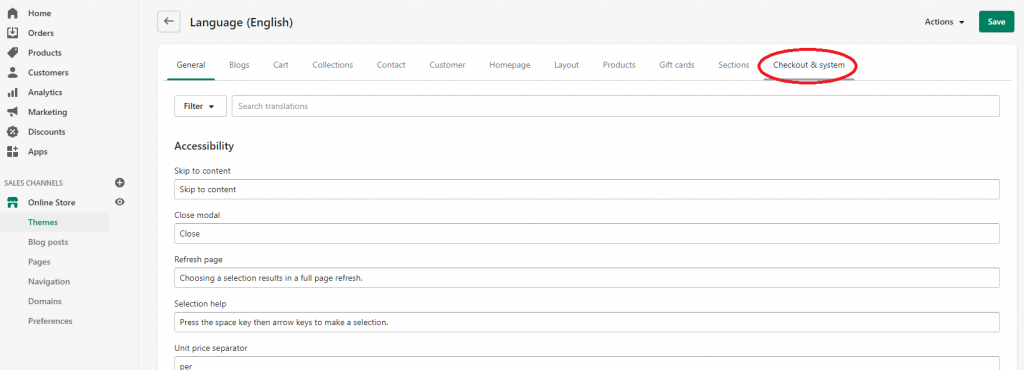
Step 4: You will now see a long list of fields with preloaded phrases. Each of these phrases are default phrases used at some point during the checkout process. By updating this field, you are able to change the text that appears on the checkout pages.
For example, let’s suppose you don’t like the phrase Keep me up to date on news and exclusive offers that is shown by default on the first checkout page:
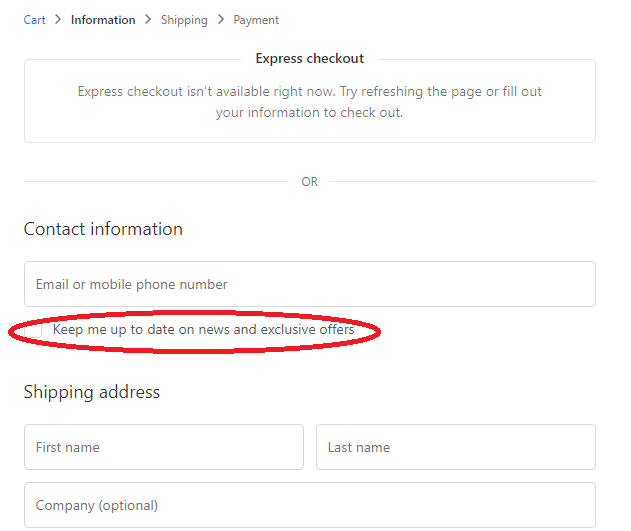
By updating the corresponding field, you can modify the text that shows here to whatever you feel is better:

Almost every field can be customized in their text content, so that gives you quite a bit of room to customize the text content.
On the other hand, you will likely face some character count limits, and only plain text can be entered. This means that formatting, positioning and any kind of dynamic content is unavailable.
In closing…
Unfortunately, due to security, consistency and reliability concerns, merchants’ ability to customize the Shopify checkout pages is quite limited.
Shopify Plus merchants do have a bit more flexibility with custom CSS and JavaScript, where interactive and dynamic content such as shipping date estimates and other dynamic data can be loaded.
The very high monthly subscription cost will likely keep most merchants from being able to afford Shopify Plus, however, and most will have to make do with the surface-level modifications we discussed today.